5
Cache Plugin Setup
DAP works great with the WP Super Cache plugin. Probably works with others too – but we have officially tested it with just Super Cache at this time.
And this page below walks you through the full set up of the WP Super Cache plugin.
___________________________________________________________
Go to Settings > WP Super Cache
You are now on the “Easy” tab. Don’t do anything here just yet.
Go to Advanced tab.
Be sure to put a “Check” (or “Select” the radio button) next to each of the following items
Caching
Cache hits to this website for quick access. (Recommended)
Use mod_rewrite to serve cache files. (Recommended)
Miscellaneous
Compress pages so they’re served more quickly to visitors. (Recommended)
Don’t cache pages for known users. (Recommended)
Don’t cache pages with GET parameters. (?x=y at the end of a url)
Cache rebuild. Serve a supercache file to anonymous users while a new file is being generated. (Recommended)
Advanced
Clear all cache files when a post or page is published or updated.
Extra homepage checks. (Very occasionally stops homepage caching) (Recommended)
Only refresh current page when comments made.
List the newest cached pages on this page.
Click on Update Status button.
Keep scrolling down until you see the Accepted Filenames & Rejected URIs section.
You’ll see a big text area under the text “Add here strings (not a filename) that forces a page not to be cached”. +
There, add the following, one per line.
/dap/
/dap/.*\.php
/dap/admin/
/dap/admin/.*\.php
/login/
/members/
/my-profile/
/my-content/
Obviously, your member content page URL’s may be slightly different. So make sure you customize it to suit your own URL’s.
Next to back to Easy tab at the top.
Now you select the “Caching On” option and save.
That’s it for the setup.
Now, on to testing.
Content Organization Tips
If you organize all of your member content under a main parent page, say “members”, then all you need to exclude from caching, is /members/
For example, if your URLs include year and you don’t wish to cache last year posts, it’s enough to specify the year, i.e. /2004/. WP-Cache will search if that string is part of the URI and if so, it will not cache that page.
So basically, excluding just one single URL – /members/ – from caching, will make sure all of the following as well remain UN-CACHED.
/members/login/
/members/home/
/members/my-content/
/members/my-profile/
/members/my-affiliate-info/
/members/course-1/
/members/course-1/module-1/
/members/course-1/module2/
/members/course-2/module-1/
/members/course-2/module2/
You get the idea. When you exclude “/members/”, any URL that starts with that same text, will be excluded.
So here’s how you set up the “hierarchy” of the pages.
First, create the page “members“.
Then, when you create the “login” page, make sure you select the “parent” of the page, to be the “members” page.
So, instead of the login page URL looking like… http://YourSite.com/login/
… because the parent page is “members”, that also gets added to the URL, and the login page URL becomes like this:
http://YourSite.com/members/login/
If you created a page called “example” and made the “login” page as its parent, then the URL for this new page becomes:
http://YourSite.com/members/login/example/
So you see how that hierarchy works. Use that to arrange all of your member content under the main “ancestor”, which is “members”, here in our example.
But if you have already completed creation of all of your content, then you’re just going to have to do a little extra work to identify all of your pages and posts and exclude the member content from the list. DAP makes this a little bit easier as well.
Getting A Full List Of Pages & Posts
If you log in via FTP and go to the “dap” folder, inside, you will see a file called “dap_permalink_dump.php”. If you download that file to your desktop, and open it with any text editor (Notepad, Dreamweaver, etc), inside you will see a full list of URL’s of all posts and pages from your WordPress site. You can just take that list, remove separator text like “Posts” and “Pages”, and trim the list of URL’s down to just your member content, you can take that and paste it right into the WP Super Cache > Advanced tab > Accepted Filenames & Rejected URIs section.
Testing Caching Impact
Now open multiple browsers – like Firefox, Chrome and Internet Explorer (or Safari). Use at least 3 separate browsers.
Next, go to your login page in one of them, and then log in. Then go to same login page in another browser – make sure it doesn’t say “You are already logged in”. It should show you the DAP login form. Same on third browser.
Next go to the profile page while logged in as member. Do the same in other two browsers, while logging in as three different people. Each profile page should you show you different information.
If you crated 3 separate products, with 3 different users, then logging in as those 3 different users on the 3 different browsers, should show you 3 different sets of pages.
All this is just to make sure there’s no caching going on of your membership content, that’s all.
If all of this works, then you’re all set with caching for your non-membership content, and no caching for your dynamic member content.
2
Troubleshooting OptimizePress Templates
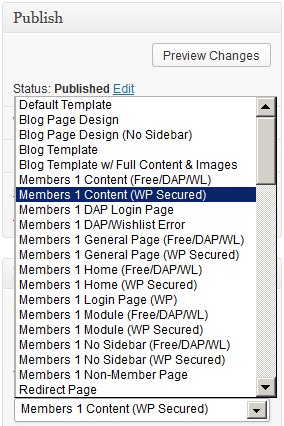
If you’re using OptimizePress as your theme, make sure you’re only using membership templates that have the word “DAP..” in them.
DO NOT USE any template that has the words “WP” or “WP Secured“. That will cause members logging in via DAP, to not be able to access those pages.
Those templates are meant for OP’s own internal membership functionality, or built for other membership plugins. Those will not work with DAP.
Templates that are OK to use with DAP
- Members 1 Content (Free/DAP/WL)
- Members 1 DAP Login Page
- Members 1 DAP/Wishlist Error
- Members 1 General Page (Free/DAP/WL)
- Etc.. anything with the word “DAP” in it.
For the other squeeze page/sales page templates, it doesn’t matter which ones you pick.
This restriction applies only to the “Members…” templates.
Customizing User Profile Fields
The old shortcode for displaying the user profile on a page, was %%USERLINKS%% which just displayed the entire user profile with all fields, without the ability to customize which fields to show.
That one is still valid. But starting DAP v4.4.3, we have a new shortcode to display userprofile.
[DAPUserProfile]
Allows you to selectively display profile fields on a page. Entering just the shortcode [DAPUserProfile] within a WP page, will show the default user profile form with all default fields being displayed.
So entering just [DAPUserProfile] on a pagem is the same as entering the full version below:
[DAPUserProfile showFirstName=”Y” showLastName=”Y” showUserName=”Y” showEmail=”Y” showPassword=”Y” showAddress1=”Y” showAddress2=”Y” showCity=”Y” showState=”Y” showZip=”Y” showCountry=”Y” showPhone=”Y” showFax=”Y” showCompany=”Y” showTitle=”Y” showPaypalEmail=”Y” showOptedOut=”Y” showCustomFields=”Y”]Not Show Certain Fields
Just set the profile field that you don’t want shown to “N” in the shortcode.
Default is “Y”. So Leaving out the text showLastName=”Y” entirely from the shortcode, is the same as setting it “Y”, which means it will be displayed.
To NOT SHOW Phone and Fax
[DAPUserProfile showPhone=”N” showFax=”N”]So all other fields will be displayed, except those two.
To SHOW just First Name, Last Name and Email
[DAPUserProfile showFirstName=”Y” showLastName=”Y” showUserName=”N” showEmail=”Y” showPassword=”N” showAddress1=”N” showAddress2=”N” showCity=”N” showState=”N” showZip=”N” showCountry=”N” showPhone=”N” showFax=”N” showCompany=”N” showTitle=”N” showPaypalEmail=”N” showOptedOut=”N” showCustomFields=”N”]To SHOW just Password field
[DAPUserProfile showFirstName=”N” showLastName=”N” showUserName=”N” showEmail=”N” showPassword=”Y” showAddress1=”N” showAddress2=”N” showCity=”N” showState=”N” showZip=”N” showCountry=”N” showPhone=”N” showFax=”N” showCompany=”N” showTitle=”N” showPaypalEmail=”N” showOptedOut=”N” showCustomFields=”N”](both main password field and repeat password will always be displayed together)
1
Approving Users Before Access Is Enabled
Problem
“Will DAP allow me to manually approve members before their new accounts are activated? The process should be…
a) new user signs up, DAP prompts that the account is pending approval
b) Admin approves the account manually and email is sent to new member with their password and login details”
Solution
Yes, this can be achieved by enabling the “Double Optin” for a product.
So, normally, when a DAP Product is made “Double Optin” by entering the double-optin subject and email text on the “Email Notifications” tab of the product, and a user signs up for this product (whether as a free sign up or as a paid purchase or Admin-add), DAP will send them the content of this double-optin email first.
And usually, the body of this email would contain the %%ACTIVATION_LINK%% merge tag, which would become the confirmation link that the user has to click on first, before their product access status becomes “Active” (from “Inactive”). And as soon as the user clicks on the confirmation link, their product status becomes active, and then the “Welcome Email” is sent out right away, and now the user can log in and start accessing the content that is protected as part of that product.
Using Double-Optin To Force Approval
If you make the DAP product as double-optin, and remove the merge-tag %%ACTIVATION_LINK%% from the email body, what happens is that the user/member will get the email, but there’s really no activation link (confirmation link) in the email for them to self-activate their account. So the email would just say something like…
“Thank you for your purchase/signup. Your account needs to be activated by us. So appreciate your patience while we do so”.
Now, their account remains at “Inactive” status. And only you, the DAP Admin, can activate it.
By now, you would’ve gotten the admin notification email for this person’s signup. So you know their email id. If not, you can just go to DAP > Users > Manage and you’ll see all inactive users.
You would then click on “Modify” to activate product access. And if the user status is also “Inactive”, then you would edit the user info, and change their status to “Active” (from “Unconfirmed”).
And then make sure you’ve added an autoresponder email (that contains the user’s email and password – insert mergecodes %%EMAIL_ID%% and %%PASSWORD%% into the email) to go out on Day #2 for that product.
And assuming you will be approving this new user at some point within the first 2 days, the autoresponder email for day #2 will get triggered within the hour as soon as you activate their account, and the user will get their welcome email.
Or you can send them the password in the double-optin email itself, but tell them that they won’t be able to log in just yet until their account is activated. It’s all up to you – DAP is as flexible as you need it to be.
So that’s how you would use the Double-Optin feature to indirectly force an “Approval” process.
5
Access Expiration Options
In DAP 4.7, we have added a new feature to the hourly dap cron where once every day (it’s hardcoded to run ONCE between 10:00 PM – 11:00 PM PDT) the cron will look for users whose access expired that day.
You can configure the Cancellation Options in DAP Products page -> Cancellation & Expiration tab.

Then based on these settings, the DAP Hourly Cron will check if the current time is between 10:00 – 11:00 pm PDT (Server time), and if yes, it will take a look at each product, pick up the ‘Expiration Action’ setting for that product, then get a list of ALL users whose access to that product has expired and apply the ‘Expiration Action’ to that user->product record in DAP users -> manage page.
The reason the DAP Cron checks the current time and runs the ‘expiration job’ only once a day is because running it too often will burden your server/resources as this job needs to pick up all products and then apply the cancellation rule to all users whose access has expired.
The main thing is to make sure it only runs once.. does not matter if that’s between 10 – 11 or 11 – 12 etc. We just picked the time to be between 10 – 11 PM (server time).
1) No Action
User’s access will auto-expire at the end of current recurring cycle. If the user re-signs, they will start from where they left off instead of starting over at day 1.
Infact this is how all older versions of dap already work.
If a user cancelled access to a subscription product before and say that the same user now wants to start back after a couple of months break.
If you have selected NO ACTION as this product’s expiration setting (in dap products page -> cancellation & expiration tab),
then when the user re-signs, they will start their dripping from where they left off and will not start fresh again from day 1.
Say a user’s access start date is 07/01/2014 and access end date is 07/30/2014, when the cron runs on 07/31/2012
and finds the user’s access has expired, it wont do anything.
If the same user re-signs for the same product on 08/30/2014 using the same email id, their access start date will be what it was before (07/01/2014) and their new access end date will simply be extended from what it was before. It will be set to previous access end date (07/30) + 30 days instead of new signup date (08/30) + 30 days. User’s access to product will remain expired. You will have to set post-expiry access to “Y” in dap setup->config page for access to ‘paid-for content’.
See this for more details: Cancellation
2) Remove From Product
If selected, dap will automatically find users whose access to this product has expired and remove user’s access to product completely for those users.
You will need this setting to prevent access for expired users. Users will completely lose access to product.
If these users signs up again, they will start over like a new member.
3) Set end date to previous day
To enable this option, you will have to first enter the following in /dap/dap-config.php file.
Please ftp to your site, find dap-config.php file, edit it and add this to your /dap/dap-config.php file:
Add it towards the top after php start tag (<?php) :
if(!defined(‘EXPIREACCESS’)) define(‘EXPIREACCESS’,’Y’);
IMPORTANT: Replace all occurrences of backticks in the line above with single or double quote character.
Then upload back to your site (under dap folder).
We are forcing the dap-config.php setup in DAP 4.7 so users do not pick this option by mistake. We also want this feature to be BETA tested fully (in DAP 4.7) and then we will remove the extra steps (to add lines to the dap-config.php).(
After you set this in dap-config.php, this dropdown option will be available in the ‘expiration action’ dropdown.
If you pick this option for a product, then DAP CRON will automatically find a list of expired users (whose access has expired to this product) nightly and move the expired user’s access start and end day (set the access end date to the previous date).
When the cron wakes up and runs this job once once every night at 10:00 PM, it will move the user’s access start / end date forward in such a way that user’s access will remain expired but the access end date will not be stuck somewhere in past. It will be always set to the previous date (from current date).
Say a user’s access start date is 07/15/2014 and access end date is 08/15/2014.
When the cron runs on 08/16/2014 and finds the user’s access has expired, it will set the access end date to previous date.
So first time when the cron runs after the user’s access expires, nothing will happen. The access end date will remain 08/15 as it’s already set to previous date.
When cron runs on 8/17, it will move forward the the access start and access end window, so the new access start date will be 07/16 (moved forward by 1 day) and end date will be 8/16 (moved forward by 1 day).
This way the user’s access is still expired (as it’s always set to previous date) but the access dates are not stuck in the past.
If they re-sign, when DAP extends access, the access end date will be in the future instead of being expired.
If the cancelled user re-signs, the user’s access will not remain expired as their access will be extended from the current access end date to a date in future and the dripping will continue from where they left off.
IMPORTANT: ADDITIONAL INFORMATION
1) EXPIRATION: SET ACCESS TO PREVIOUS DATE
We recommend that you enable this option ON a test product first. DO NOT use this option on an actual live product. Add a few test users to the test product. Move their access start/end date manually to a date in the past .Make a note of it. Enable the admin option to ‘move date to previous date’ for this product. Then run the cron manually. Go back to dap manage users page and check the new access start / end dates for these users. If all looks good, then use it for live products.
2) CRON JOB:
The dap cron (dap-cron.php) runs once every hour at the top of the hour… but it will only do the expiration job between 10- 11 PM (server time). The expiration part of the cron only executes once a day.
To force run the cron, run this command in a browser (dont run cron too close to the top of the hour as it will collide with the normal running of cron ).
http://yoursite.com/dap/dap-cron.php?forcerun=Y (replace yoursite.com with the name of your site)
3
AuthSMTP Integration
If you’re having email delivery issues on your host, you can connect DAP to 3rd-party email systems like Amazon SES and AuthSMTP.
In this article, you’ll see how to integrate DAP with AuthSMTP.
- Signup for an account at AuthSMTP
- Log in to your AuthSMTP account
- Go to Registered From Address tab
- Take the email id from DAP Admin > Setup > Config > From-Email Id and enter that email here and register it here (basically, you’re whitelisting your DAP Admin email id as a registered sender – if you don’t do this, AuthSMTP will reject and discard all emails sent via DAP). You will need to “Confirm” the registration by clicking on an activation link that they will be sending you.
- In your AuthSMTP account, go to SMTP Details tab.
- Make a note of the SMTP Server (usually mail.authsmtp.com), SMTP Username, SMTP Password.

- Now log in to DAP Admin, and go to Email > SMTP
- On this screen, use the section Add a New SMTP Server to create a new SMTP row as follows:
Description: AuthSMTP
Server: mail.authsmtp.com (or from Step 6 above)
Port: 2525 (must be exactly that)
SSL: N (must be exactly that)
User Id: Your AuthSMTP Username (from Step 6 above)
Password: Your AuthSMTP Password (from Step 6 above)
Email Sending Limit Per Hour: 500
(Max 500 if on shared server. Max 2000 if VPS or dedicated server)
Activated: Y - Click on the “Add” button to create and save the new AuthSMTP server setting.
- And now you should see two rows under Manage Existing SMTP Servers: One for “Local Web Host” and another for “AuthSMTP”.
- For the “Local Web Host” row, be sure to set “Active” to “N” – because now that you have set up AuthSMTP, you want all instant welcome emails, autoresponder and broadcast emails to be sent out through AuthSMTP, and not your web host’s email server.
That’s it!
Protecting Draft Content
Now, normally, links to pages or posts show up in the left-hand side of the ContentResponder tab of the DAP Product only after they’ve been published.
But sometimes, for whatever reason, you may wish to protect pages or posts even before they are published – like in a “Draft” or “Pending Review” status. So here’s what you do.
As soon as you first create a new post or page, and tab out of the title field, and even before you save the post as a draft, or publish it, WordPress will create and display the permalink for that post/page, based on the text in your title.
So, if your page title is “Protecting Draft Pages”, then the default permalink will take on the structure http://YourSite.com/protecting-draft-pages – basically a lower-case version of the title, with hyphens separating the words. Like this…

You can then copy that entire permalink from where it is displayed, go to the DAP Product’s ContentResponder section, scroll down to the section that says “Protect a URL”, and then paste the entire permalink there (http://YourSite.com/protecting-draft-pages), and click “Add URL”.

That will protect this page or post in advance of it being published.
Affiliate Commissions For Offline Payments
DAP is one of the very few membership platforms that will let affiliates earn commissions on offline payments too.
And in fact, DAP will credit affiliates for not just offline payments, but for any payments that you accepted outside of the payment options listed on your web site.
So, for example, you’re using Paypal and Authorize.net buttons on your site. And someone wants to send you a check (cheque) in the mail, or they want to send you money via Western Union, or wire transfer, or they call you and you accept their credit card information by phone, or any other such offline methods.
In this case, DAP can still give credit to the right affiliate for the sale. Here’s how…
1) Add Manual Transaction
- First you add the user manually, by going to DAP Admin > Users > Add.
- Once you’ve added them to the product, come back to DAP Admin > Users > Manage.
- Search for the user by email
- On the user data row for that Product, initially, under Trans Id column, it will show PAID (see image below)
- Step 1: Enter a manual transaction by clicking on Add Trans (which stands for “Add Transaction”). That will record your offline payment in DAP. So now there’s an actual payment associated with that user’s sign up.

- When you click on the “Add Trans” link, you will see a small popup appear (see image below) that allows you to manually enter an order. So if the offline payment was for say $97, then you would enter “97” or “97.00” in the “Order Amount” field and click on “Submit”.

- Once you’ve entered a manual order, the “Trans Id” column will change from “PAID” to an actual transaction id.
That’s it.
By this time, the user would’ve received their “Welcome Email” from DAP, which will have their login info to log in to your site.
And when they log in, if they have an affiliate cookie set in their browser (which they would, if they had clicked on an affiliate link at some point before they contacted you and asked you about a non-standard, offline payment method), then when they first log in to your member’s area, DAP will pick up the referring affiliate’s id from the affiliate cookie, and give credit to them for the sale.
And when the DAP hourly cron runs at the top of the next hour, that affiliate will be credited with any commissions that you’ve set up for that product.
4
Group Memberships And Sub-Accounts
So you want to use DAP to sell group memberships or sub-accounts.
Eg. 1) A group membership – or multi-user account – that a School/College/Teacher can buy on behalf of their students. It’s either a one-time product, or could be a subscription product. In that case, buyer keeps paying monthly, and when they stop paying, all sub-users (child accounts) get disabled.
Eg. 2) Company A pays $X for up to 20 of its employees to have individual memberships. To begin with, the money is collected in one lump sum and DAP grants 20 memberships. Then each month Company A pays the Corporate/Umbrella/Bulk Membership and DAP gives credit to the individual memberships. If Company A fails to pay, all the “sub” members underneath lose access.
How To Implement Group/Bulk Memberships
DAP doesn’t directly support sub-memberships or sub-accounts yet. We already have this on our humongous to-do list :-). And we definitely plan on implementing it soon. But for now, here’s a work-around for making this happen. It’s fairly simple, yet it is manual, and cannot be automated yet.
- You would set up a One-Time product in DAP called, say, “20-Seat Membership“. If you wish to sell different quantities of “seats” or “licenses”, then you have to create as many products (like “5 Seats”, “10 seats”, “50 seats”, etc).
- In the welcome email, you would instruct buyer to email you a CSV file with 20 (or as many as your product allows) names and email id’s, one per line, in this format (EMAIL,FIRST,LAST):student@gmail.com,John,Student
another@yahoo,com,Jill,Freshman
…
…
member20@yahoo,com,Joe,Senior - And then, using DAP’s bulk-import feature, in one fell-swoop, you can add all 20/50/100 to your membership site and give them all their own accounts, usernames and passwords, that they can all use to independently log in to your web site.
- If you see Step 1 above, we advised to make this a One-Time product. The reason for that, is you give life-time access first, and if they stop paying, then you cancel manually. So if the main buyer stops paying the subscription, this is the only time you will have some manual work hunting searching for those 20/50/100 email id’s on the Users > Manage page, and then clicking on “Remove” on their user row, so that they completely lose access.
Until we include this feature in DAP and make it automated, there are two ways to look at this.
One: You could say, it’s too much work to remove 20/50 emails when the main buyer cancels. OR…
Two: Since this is a group membership, you are hopefully charging them a good fee for this (if not, then you certainly should!). So you can always hire someone for $5 or $10 per hour on Odesk and have them do the removal of those email id’s. Removing 50 email id’s would take about 20 minutes at most. And you would need to do this only when they cancel, which can happen only once per group membership.
So hope that helps give you some ideas.
Hope this makes sense.
1
Leveraging Multiple Affiliate Networks
DAP is so powerful and flexible, that you can sell access to your membership through different payment processors, all at the same time.
And we often get asked how to leverage different affiliate networks like ClickBank and JVZoo and Warrior Plus at the same time while making sure no affiliate commissions are lost, and every affiliate gets credited their commissions for sending potential buyers to your site.
The Big Picture
1) If buyer arrives ONLY through DAP affiliate link, and ends up purchasing through ANY payment processor, then DAP affiliate will get credit.
2) If buyer arrives ONLY through CB affiliate link, and ends up purchasing through CB payment processor, but the buyer has a different DAP affiliate’s cookie from a link he clicked on at some point before (but did not purchase at that time, say), then both CB affiliate and DAP affiliate will get credit (double commissions on same purchase, but to two different affiliates).
If there’s no DAP cookie on his computer, then only CB affiliate will get the commission.
If the DAP affiliate “chains” two of his own affiliate links – his DAP affiliate link and CB affiliate link – like shown below, then same affiliate will get both CB commission as well as DAP commission. Again, double commissions but to same person.
http://YourSite.com/dap/a/?a=1234&p=http://hop.clickbank.net…./
3) If buyer arrives ONLY through JVZOO affiliate link, and ends up purchasing through JVZOO payment processor, but the buyer has a different DAP affiliate’s cookie from a link he clicked on at some point before (but did not purchase at that time, say), then both JVZOO affiliate and DAP affiliate will get credit (double commissions on same purchase, but to two different affiliates).
If there’s no DAP cookie on his computer, then only JVZOO affiliate will get the commission.
If the DAP affiliate “chains” two of his own affiliate links – his DAP affiliate link and JVZOO affiliate link – like shown below, then same affiliate will get both JVZOO commission as well as DAP commission. Again, double commissions but to same person.
http://YourSite.com/dap/a/?a=1234&p=http://jvzoo.com/c/1944/17
The Right Setup For Multiple Affiliate Networks
To make sure that you’re not paying double-commissions on purchases, and also to make sure that sales don’t get lost between affiliate networks (and your affiliates losing their commissions in the process), you have to set things up the right way.
The main thing to do, is to create a separate set of the following for each affiliate network:
- A separate DAP product
- A separate Sales Page
- A network-specific buy button on that sales page
- If it’s a product that is sold through CB or JVZoo or DigiResults (or any of the affiliate networks), then DO NOT set up commissions for that Product in DAP. So that will prevent you paying a commission to, say, a CB affiliate as well as a DAP affiliate for the same purchase.
So the net effect of this, is…
If a CB affiliate sends traffic to a page, that page must have a CB buy link ONLY on that page. If you have, say, a JVZoo button on that same page, and the buyer buys through the JVZoo link, then the CB affiliate will get no commissions for that purchase. Which means, they will stop promoting your product because you’re basically funnelling off their visitors to a different affiliate network.
Similarly, the landing page for JVZoo affiliates must have only JVZoo buy buttons.
Landing page for a regular payment processor – like Paypal or Authorize.net – should have only a Paypal and/or Authorize.net buy button (and no CB or JVZoo buy buttons). In this case, for these products in DAP, you should set up an affiliate commission row on the “Affiliates > Manage” screen, so that your DAP affiliates can get credited for sales made through your regular web site.