CCBill Integration
DAP now fully integrates with CCBill for Payment Processing and User Management.
Steps below:
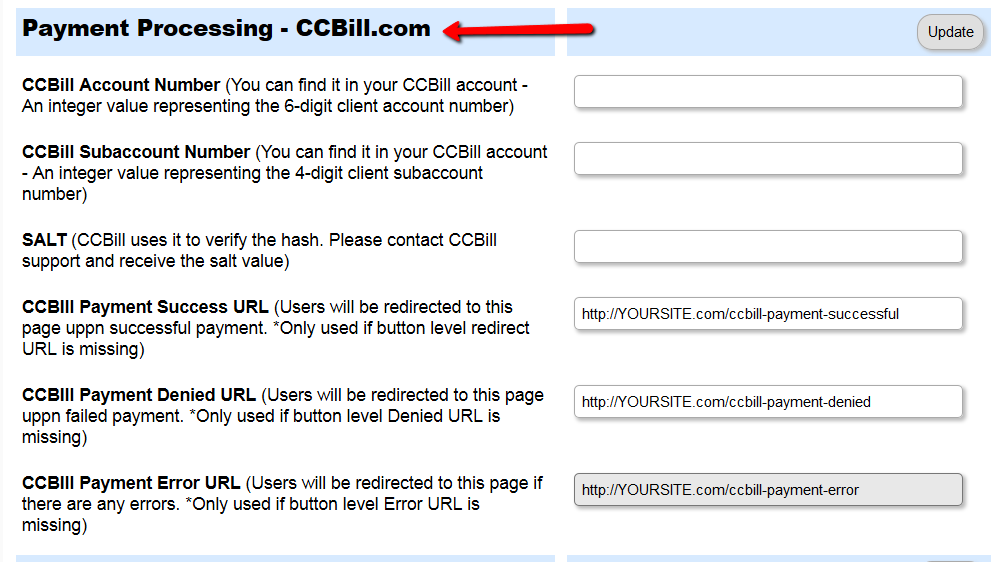
1. Setup the DAP Admin -> Setup -> Config section
2. Generate Payment Link / Button
Visit DAP Admin -> Payments -> Generate Buy Buttons Page.
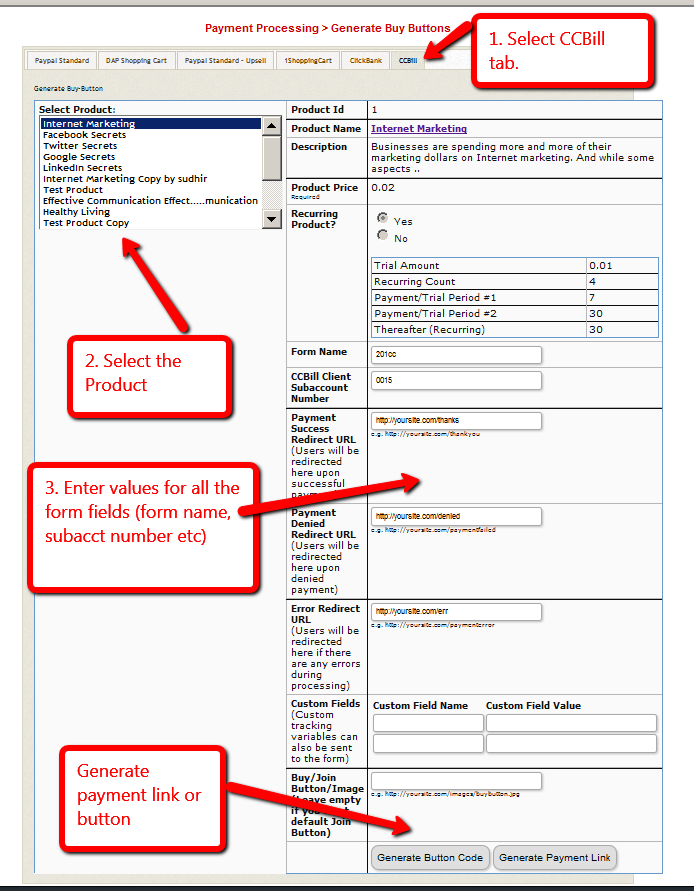
3. Publish the Payment Link / button on your Sales Page
Enter the generated button code or payment link in the step 2 above in your Sales page.
4. CCBill -> Account Info -> Subaccount Admin -> Select Webhook Setup in the left sidebar.
Set up the webhook to allow ccbill to notify DAP of all payment events.
The webhook URL should be:
http://YOURSITE.com/dap/dap-ccbill.php
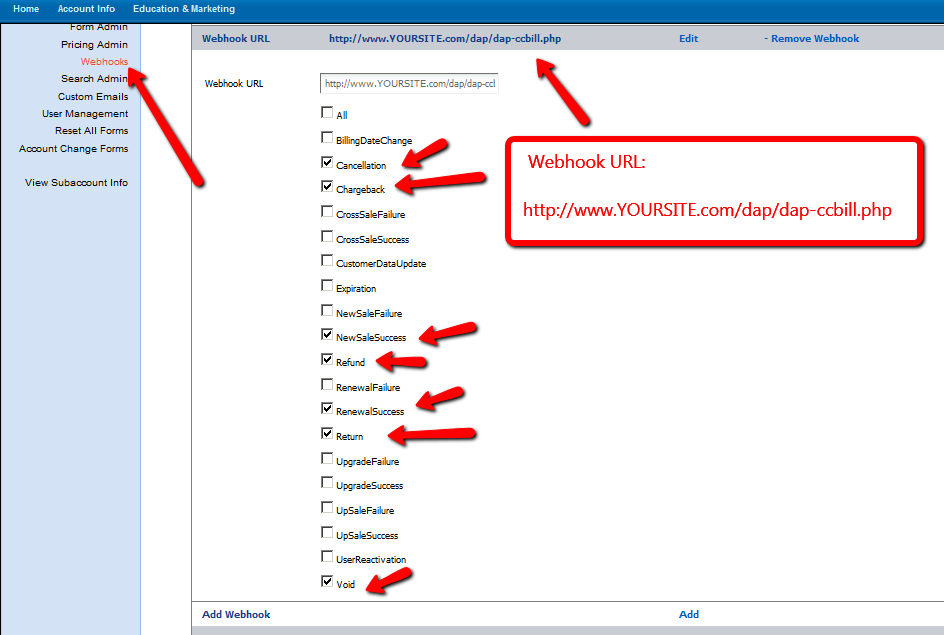
DAP can process these CCBill events :
NewSaleSuccess, RenewalSuccess, Refund, Cancellation, ChargeBack, Expiration, Void, Return
Upon renewal, ccbill will notify DAP via this webhook url and dap will automatically extend user’s access to the product using the subscription cycle settings in DAP Products page -> Pricing tab.
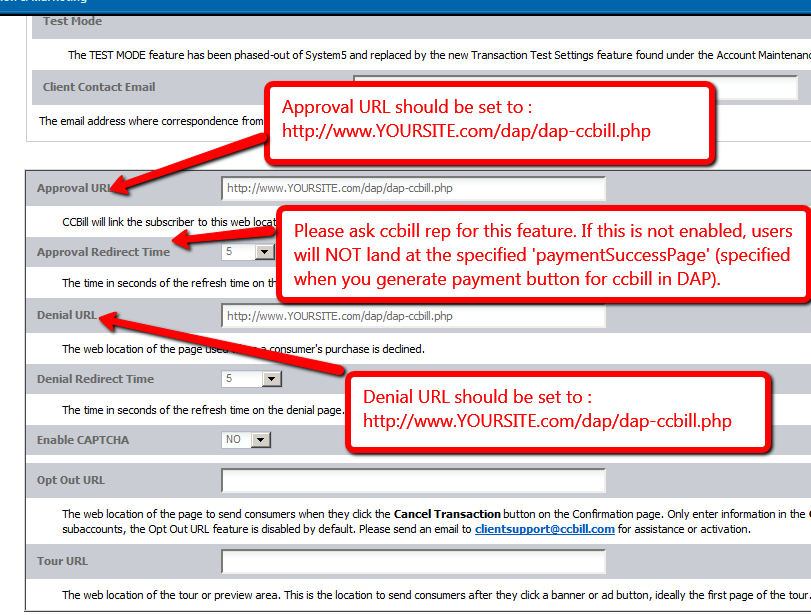
5. CCBill -> Account Info -> Subaccount Admin -> Select Basic Account Setup -> Set Approval / Denial URL / Landing Page
CCBill will automatically send users to the approval page upon successful payment. Set the approval url to http://YOURSITE.com/dap/dap-ccbill.php. Your end users will not see the dap-ccbill.php script. It’s an intermediate script that will first complete the processing in DAP and then forward users to the final landing page. You can setup the final landing page (payment success redirect url) when you generate the payment button in step 3 above.
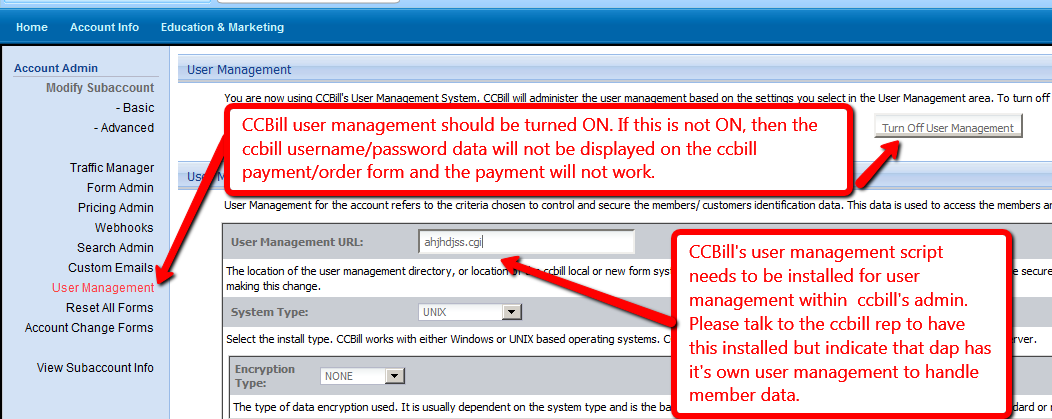
6. CCBill -> Account Info -> Sub-Account Admin -> Select User Management -> It needs to be Turned ON.
That’s it. You can now test the CCBill Integration with DAP !