Clickbank Integration
Clickbank Integration with DAP
1. Login to your ClickBank account
2. Go to the "Account Settings" tab at the top
3. Click on "My Site" from the sub-menu at the top.

4. Under Advanced Tools, update the Instant Notification Service (INS) URL (accept the terms of service etc), and make sure the URL points to:
http://YourSite.com/dap/dap-clickbank-6.0.php (Version 6.0)
Replace YourSite.com above with your actual domain name.
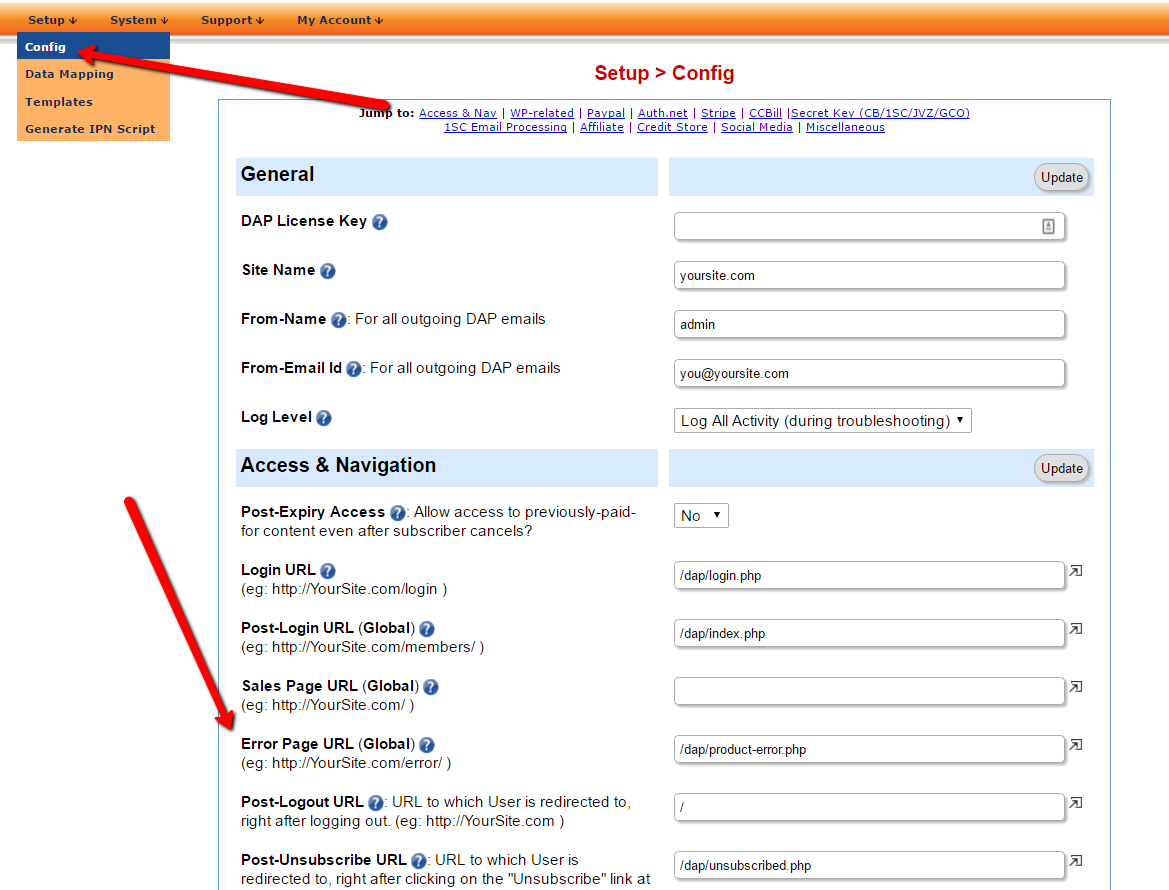
5. Enter any secret key in Clickbank. Whatever you enter in the Secret Key field in ClickBank, enter the same value (must be ALL UPPERCASE) in to your DAP Admin Dashboard on your web site, at:
DAP Admin -> Setup > Config > Payment Processing > Secret Authorization Key field

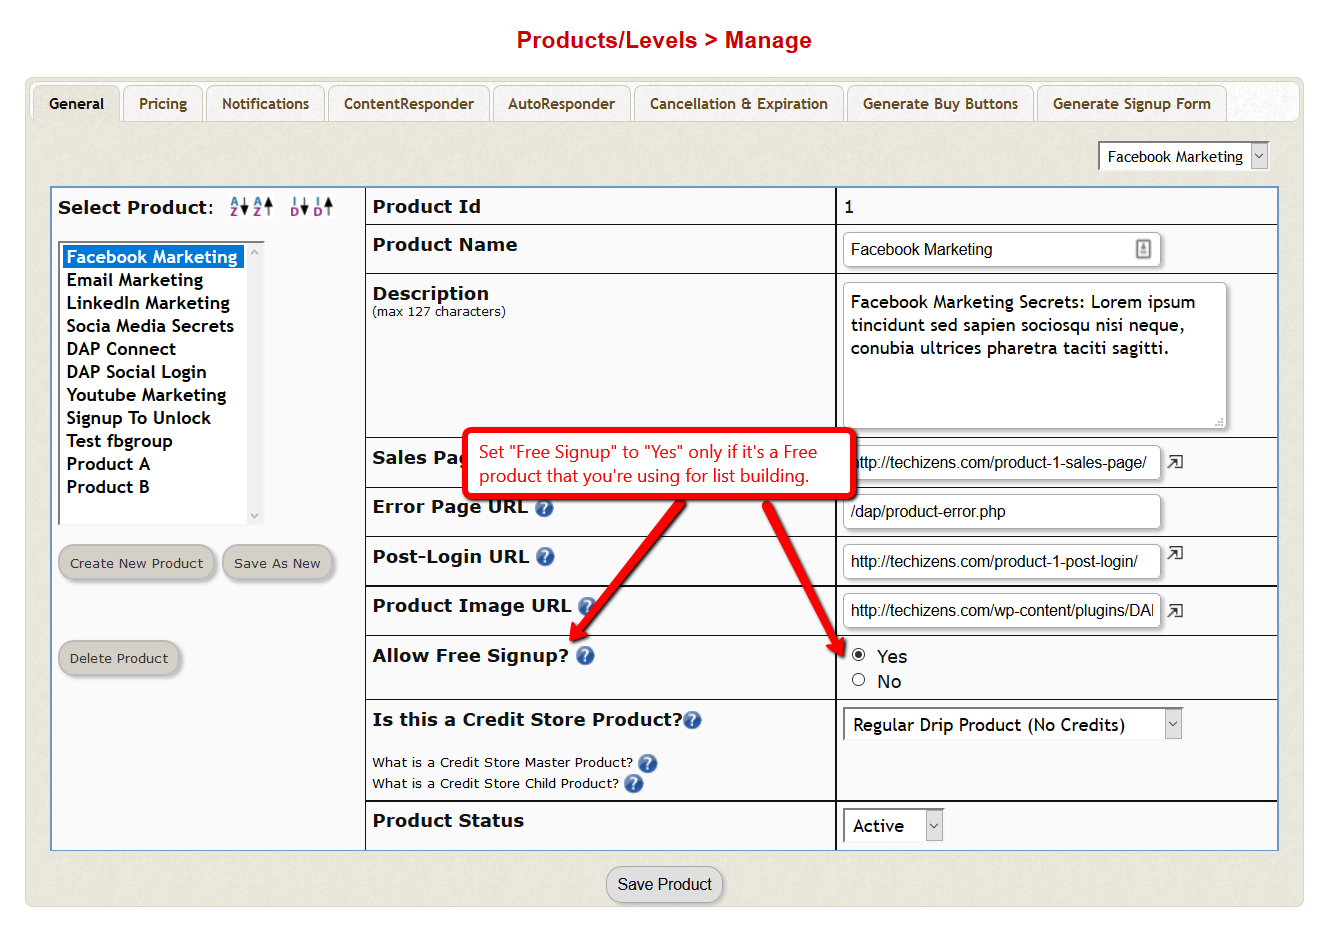
6. Create your product in Clickbank.
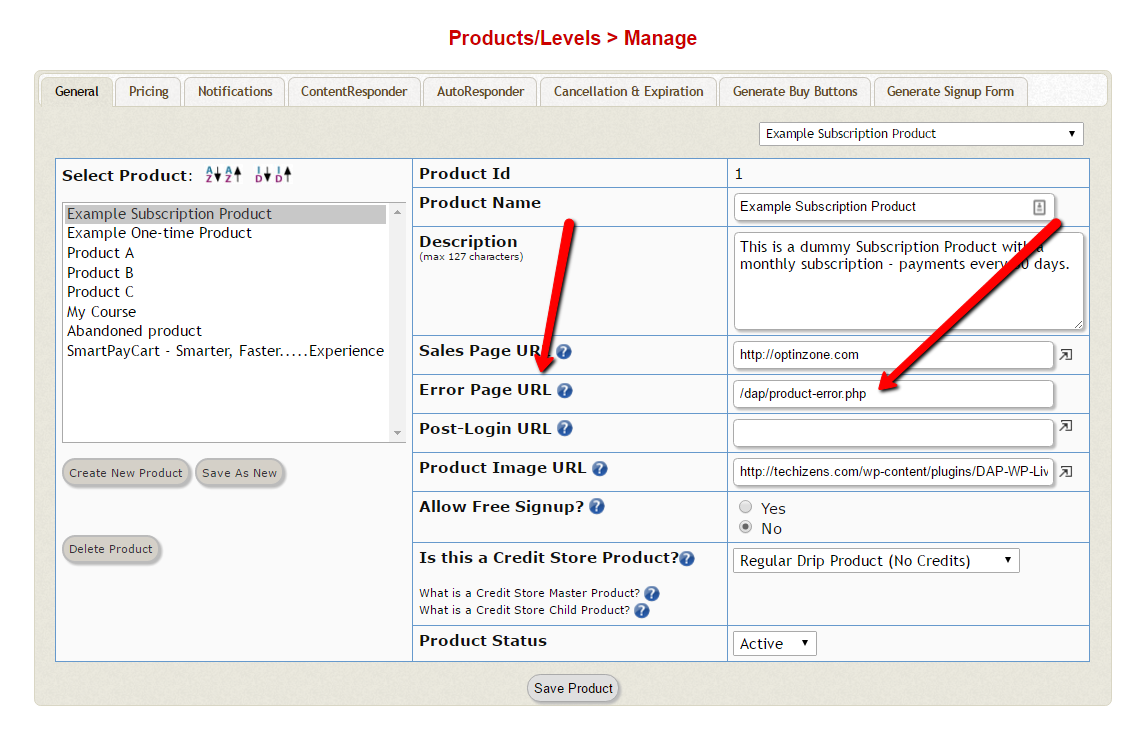
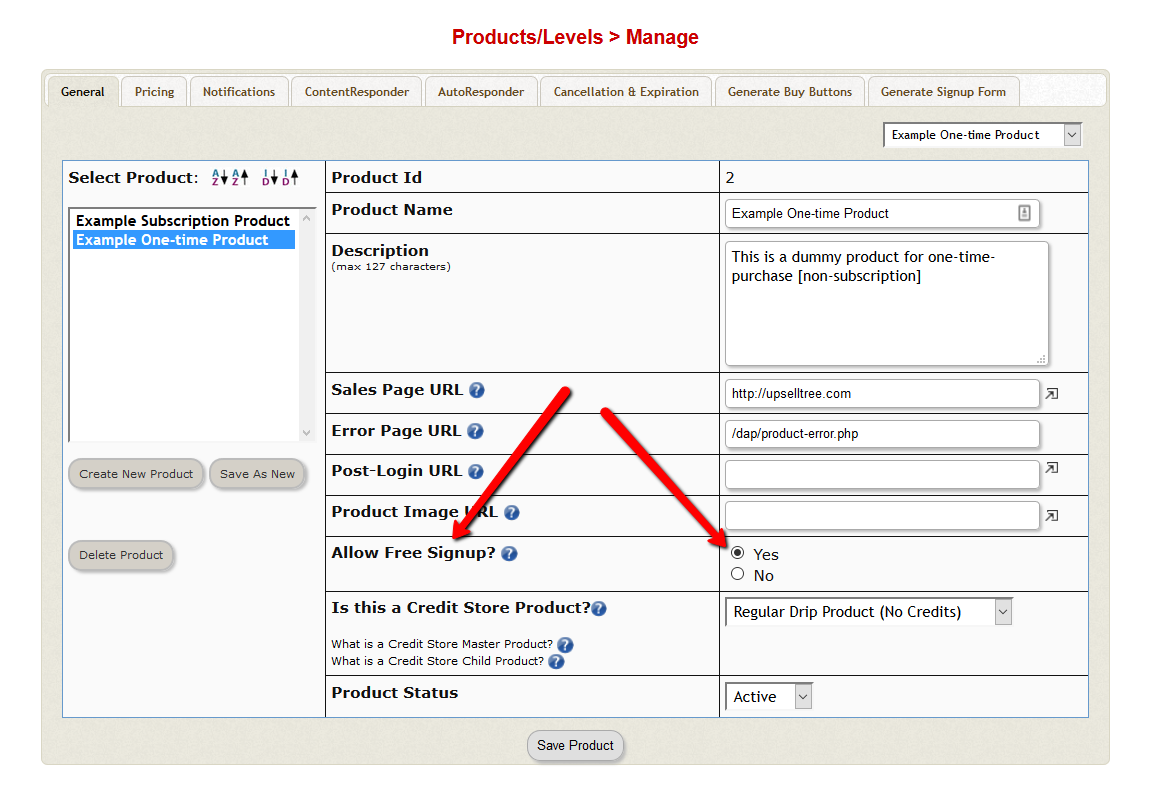
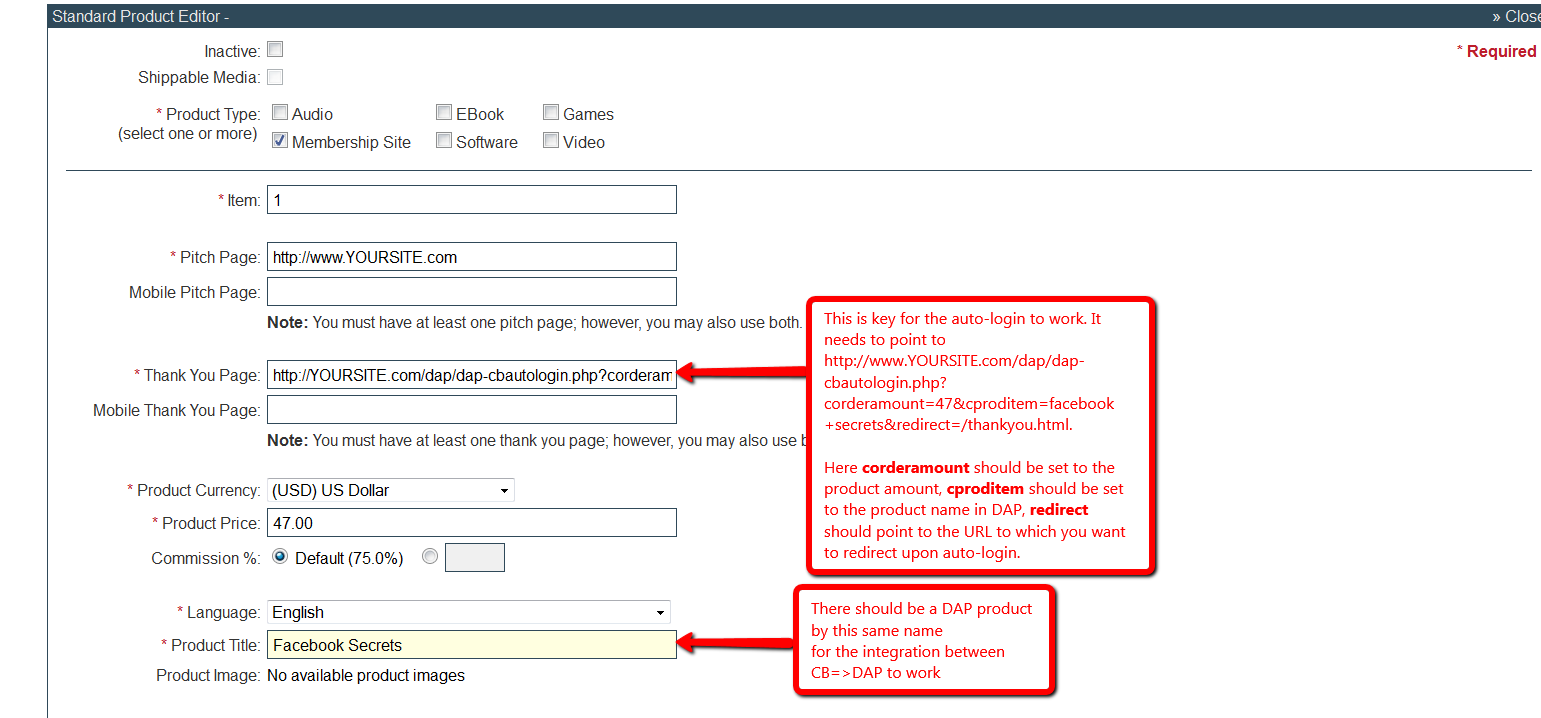
7. Create same name product in DAP.
IMPORTANT: The Product Title in CB must match the Product Name in DAP.
The product price in DAP does not have to match your CB product price. DAP will use the CB price for purchases made via CB. The price that you set in DAP is ignored for CB purchases.
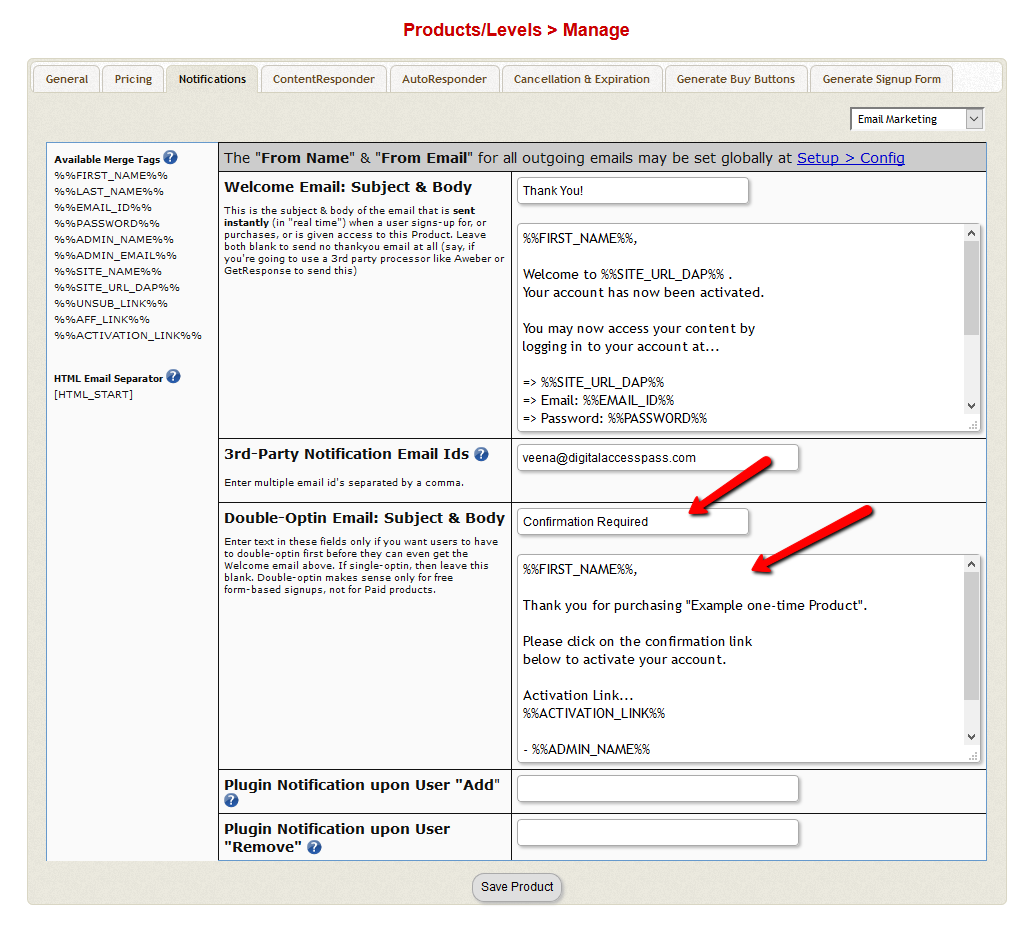
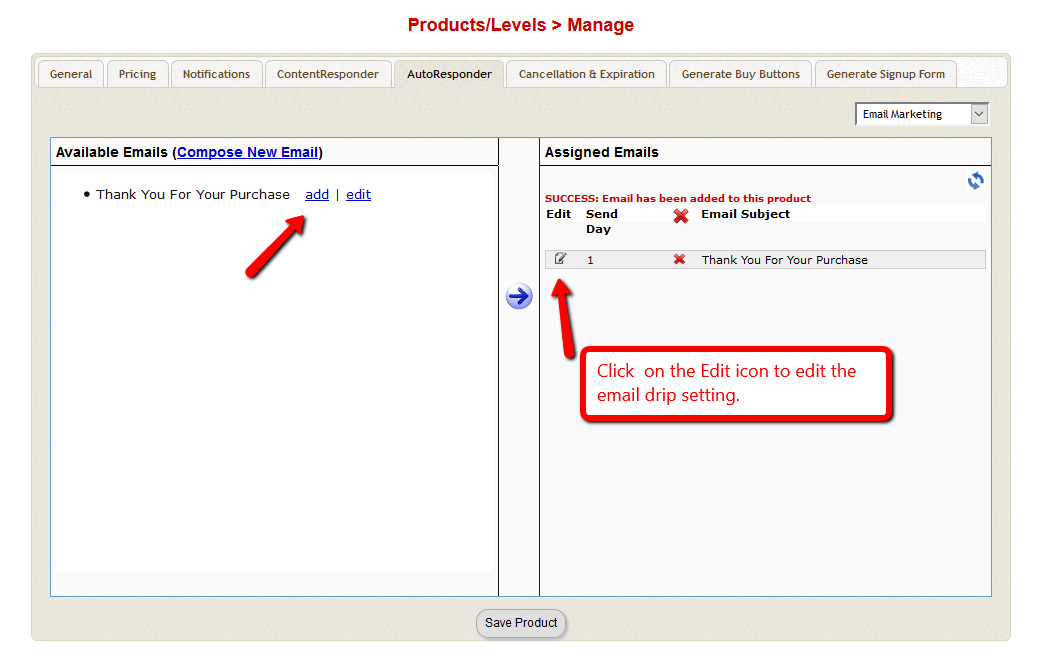
8. That's it. When users complete CB purchase, Clickbank will notify DAP and DAP will automatically create a membership account for your user. If you want DAP to send out a welcome email with login credentials to your members, be sure to customize your welcome email content in DAP products page >> Notifications tab >> Welcome email field.
Clickbank Automatic Login
DAP can automatically login your members after a successful purchase. They don't have to wait for their welcome email to login. The buyers will get auto-logged-in when they click on the 'Complete My Purchase' button on the Clickbank page after they complete purchase. But even if they decide to abort and do not click on the 'Complete My Purchase' button, DAP will still create membership account and give users access to purchased product(d) using CB INS notification.
Watch this video to see how you can autologin your members to DAP after their Clickbank Purchase
Auto-Login your members to their membership area after a Clickbank Purchase.
CB Autologin URL:
Enter the CB autologin URL in your Clickbank Products page >> Thank You Page field.
For e.g. http://www.YOURSITE.com/dap/dap-CB-autologin.php?corderamount=47&cprodid=2&cproditem=facebook+secrets&redirect=/thankyou.html
The corderamount should be set to your product price in the thankyou url querystring.
The cproditem needs to be set to your CB product name (replace space with "+" in the name, for ex- "facebook secrets" will be "facebook+secrets").
The cprodid needs to be set to your CB product ID.
Set the redirect tag to tell dap where to send the user after they are logged-in automatically. If you want to redirect to http://YOURSITE.com/thankyou.html, then set the CB thankyou URL to:
Clickbank Products page >> Thank You page URL
Clickbank - Refund/Cancellations
If a customer contacts you to request a refund or cancellation, you can initiate a refund or cancellation ticket from within your ClickBank account. And when you complete the refund / cancellation in CB, DAP will automatically remove user’s access to product.
1) Login to your CB account. Just visit the Transactions page of your account which is located under the Reporting Tab.
2) On the Transactions page, you can look up the order by the customer’s email address or order number.
3) A link to open a ticket on any order is available when you search for transactions (orders) from the Transaction page under the Reporting tab. Simply click on the “T” in the Actions column for that order. The Actions column is on the far left of the table.
4) When the ticket comes up, select “More options…” from the drop-down menu and choose the option to either refund or cancel the order as you needed. Add a comment showing that you as the vendor have honored the customer’s request for a refund or cancellation and then process the action and send the notice to the customer by pressing the “Send” button.
5) As the vendor, when you request a refund/cancellation, the ticket processes in 5 minutes, not one business day. It is assumed you do not want to try to save the sale if you enter the request yourself. You have 5 minutes to close the ticket before the refund/cancellation occurs, in case you mistakenly created the ticket.
6) After the refund/cancellation is complete in CB, CB will send an INS notification to DAP.
DAP will automatically remove the user’s access to the product. The users can still login to their membership but can no longer access any protected content under this product.
Setting Up DAP & CB PitchPlus Integration
The basic idea is the same for DAP/CB integration, whether it’s one product, or multiple Upsell products .
- Start with CB INS (and Autologin) integration as specified in this document.
- Now, if you were selling just one product, then you could follow the steps above for 'autologin'. After a successful purchase, your buyers will be auto-logged-in to their membership where they can access the purchased product. If you do not want to autologin your buyers after purchase, you could send them to a static “Thank You” page where you would tell them to check their email inbox for login details, and by that time CB would have already notified DAP via their “Instant Notification Service” (INS – kind of like Paypal’s IPN), and DAP would have already sent them the welcome email to the buyer’s email address, which contains their login and password to the member’s area.
- But if you want to offer upsells, then instead of sending them to a thank-you or members page after the first purchase, you basically send them to the sales page of your next upsell, that’s all.
Once that’s done, then for every Front-end product or Upsell-product, they are all integrated with DAP the same way. Just make sure the Clickbank Product Title and the “Product Name” in DAP both match, that’s it!
And for the last product in your upsell, be sure to point it to a static page containing a message like “Thank You, please check your email inbox for login details”.
And since CB notifies DAP separately for each product purchased, right then and there, if they end up buying 3 products during checkout (1 main + 2 upsells), then DAP will send the user 3 separate welcome emails (that you can customize in DAP products page >> Notifications tab).
Plus since they would be using the same email id for all 3 purchases, DAP will give them access to all purchased products under a single DAP account. So they need to log in to just one account to access content from all products that they just purchased.