How to integrate BuddyBoss with DigitalAccessPass (DAP)
Integration between DigitalAccessPass (DAP) and the BuddyBoss platform will allow you create a powerful online communities membership site.
You can control access to your BuddyBoss groups and profile types at "membership/product level".
Assign Group & Profile Type Access Based on Membership Level/Product
When users receive access to a Product/Level
When users lose access to a Product/Level (subscription cancellation or access is removed)
Assign Access to Profile Types
Simple Steps to integrate DAP with BuddyBoss
Step 1: Download the BuddyBoss Add-On from your Members Area on DigitalAccessPass.com

1. Login to your Members Area on the DigitalAccessPass Site.
2. Under the "Downloads" tab, you'll find the BuddyBoss Add-On. Download it.
3. Upload it to your site via WordPress Admin >> Plugins >> Installer.
4. Activate the DAP BuddyBoss Plugin.
Step 2: Set up Group Rules
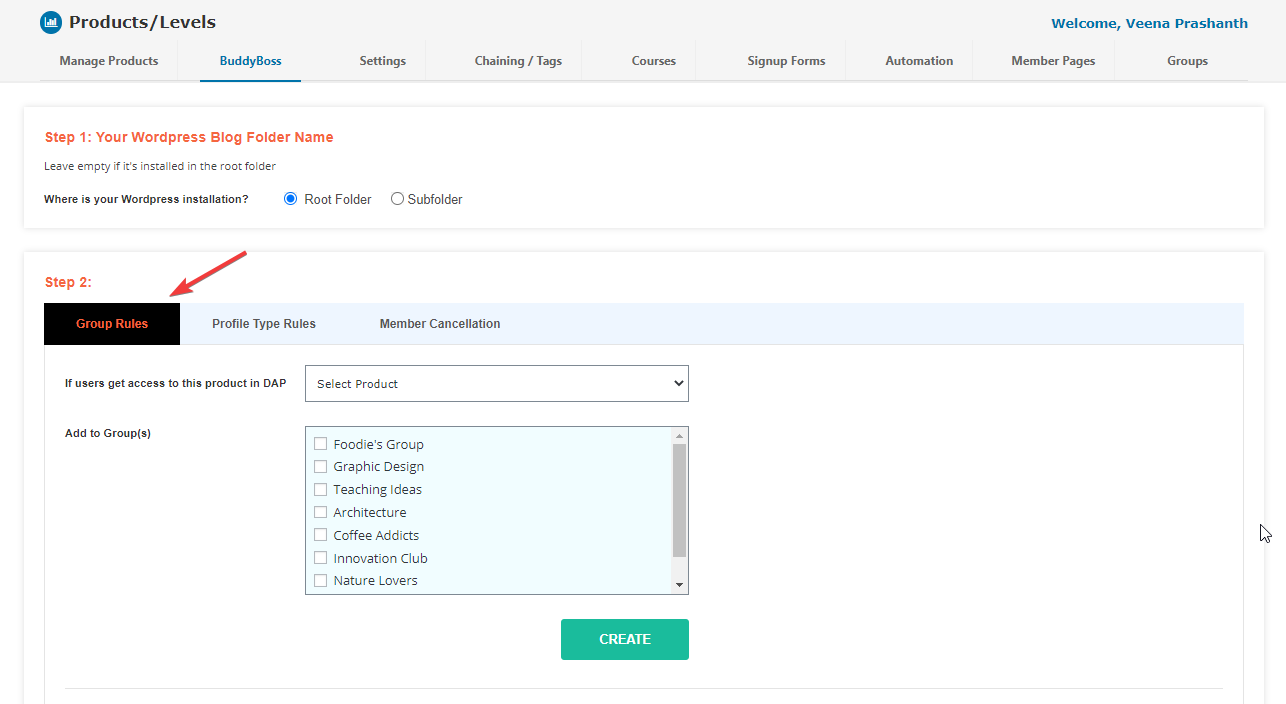
1. Go to DAP Dashboard >> Products/Levels >> BuddyBoss page.
2. In the Group Rules tab:
-> Select the DAP product/level.
-> Add To Group: Select the BuddyBoss group(s) to which you want to give access.
-> Remove from Group: Select the BuddyBoss group(s) from which you want to remove access.
3. You can set up different add/remove group rules for different products/levels.
Step 3: Set up Profile Type Rules
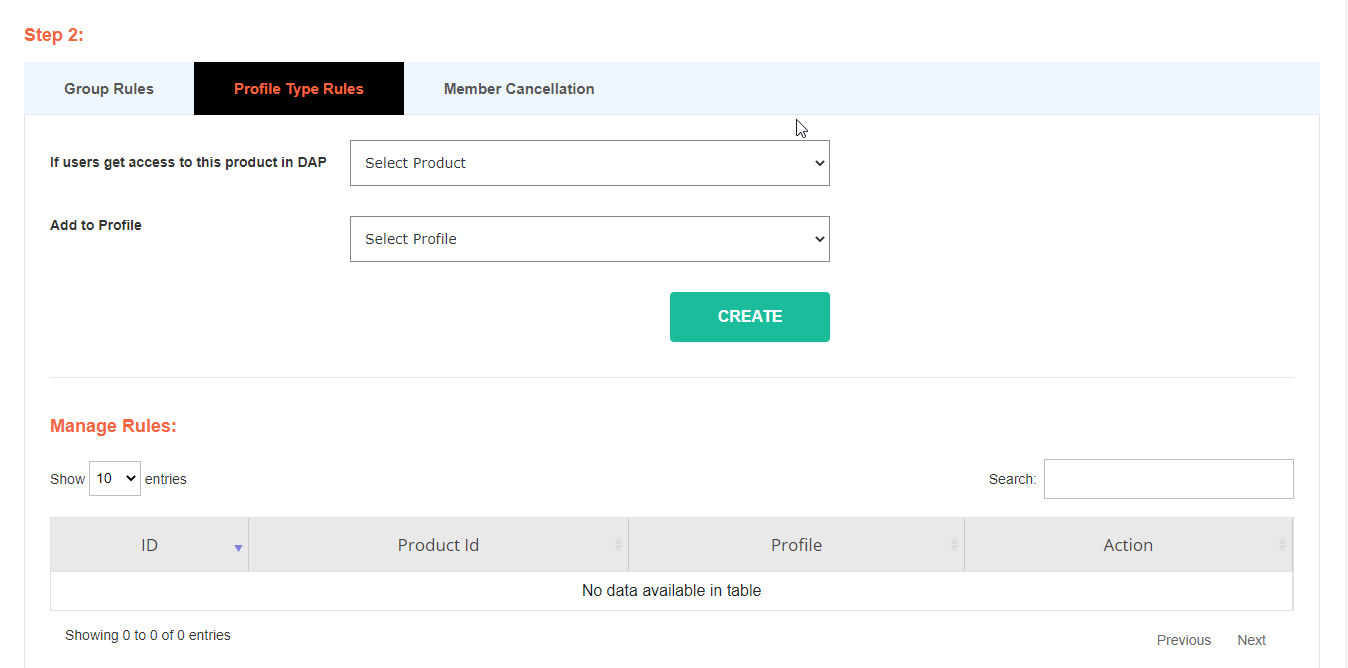
1. Go to DAP Dashboard >> Products/Levels >> BuddyBoss page.
2. In the Profile Type Rules tab:
=> Select the DAP product/level.
=> Select the BuddyBoss profile type to which you want to give access.
3. You can set up different profile type rules for different products/levels.
Step 4: Member Cancellation / Remove Rules
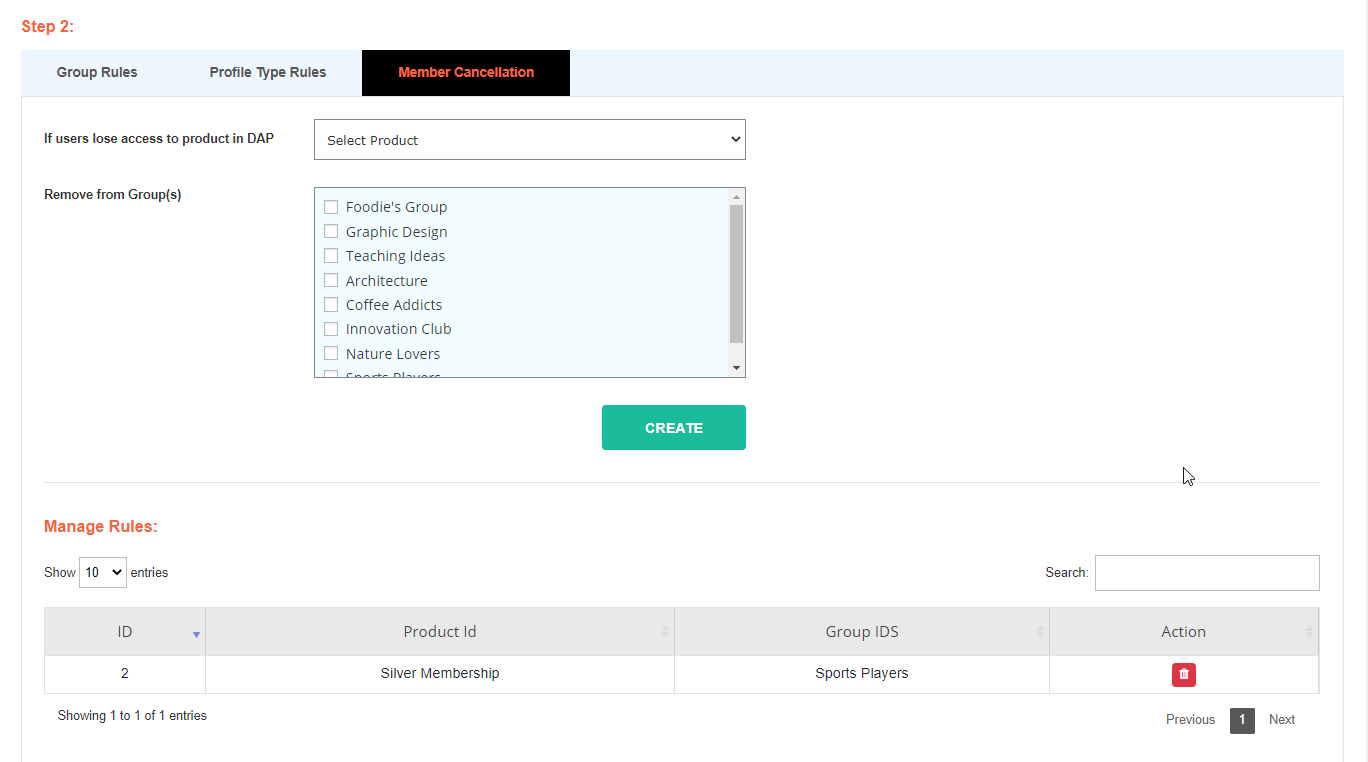
1. Go to DAP Dashboard >> Products/Levels >> BuddyBoss page.
2. In the Member Cancellation tab:
=> Select the DAP product/level.
=> Select the BuddyBoss group(s) from which you want to remove access.
3. You can set up different cancellation rules for different products/levels.
How to Test this Integration
Say you have two products - Product A and Product B.
Set up group and profile rules for both of these products before your start testing.
Use Case 1: Give Access to Product A
1. Go to DAP Dashboard >> Members >> Add page
2. Add a NEW user to a Product A (for which you've setup "Group and Profile Type" Rules).
3. Login (via the DAP login page) using this new members' email / password.
4. Visit your BB Profile. See if you were added to the right group and assigned the right profile types.
Use Case 2: Give existing user access to Product B
1. Go to DAP dashboard >> Members >> Manage page.
2. Find the user that you added in the previous test case. Now give this user access to Product B.
3. Login (via the DAP login page) using this new members' email / password.
4. Visit your BB Profile. See if you were added to the right group and assigned the right profile types.
Use Case 3: Member Cancellation
1. Make sure to setup cancellation rules in DAP dashboard >> BuddyBoss page for products A and B.
2. Go to DAP Dashboard >> Products/Levels page >> Find the product >> Click on the Advanced Tab >> Set "Cancellation/Expiration" action to "Remove from Product".
3. Now to test this, go to DAP Dashboard >> Members Manage page >> Find the user from earlier tests and click on the "trash" icon to remove their access to product A or B. See if the cancellation rules are triggered. See if the group and profile type is set correctly in BuddyBoss.
FREE DOWNLOADS


Don't have a
DAP/SPC License yet?
No platform will give you as many options as SPC & DAP to grow your sales! Be sure to check out our platinum and elite packages!